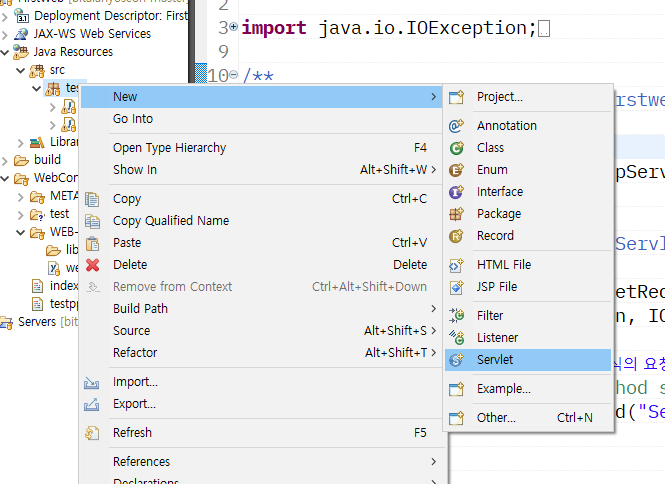
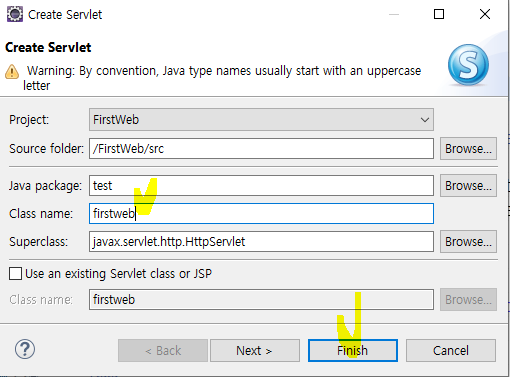
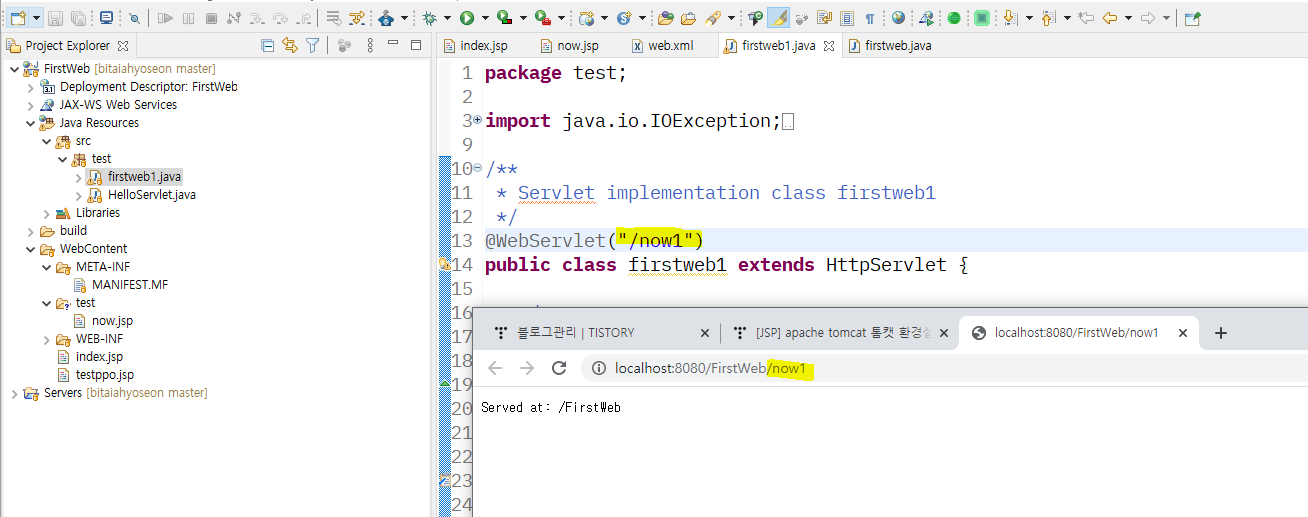
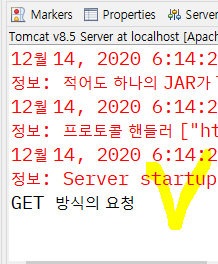
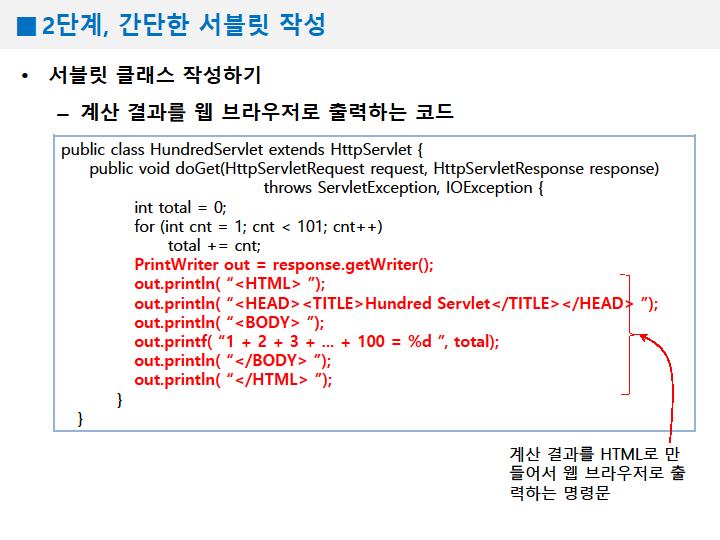
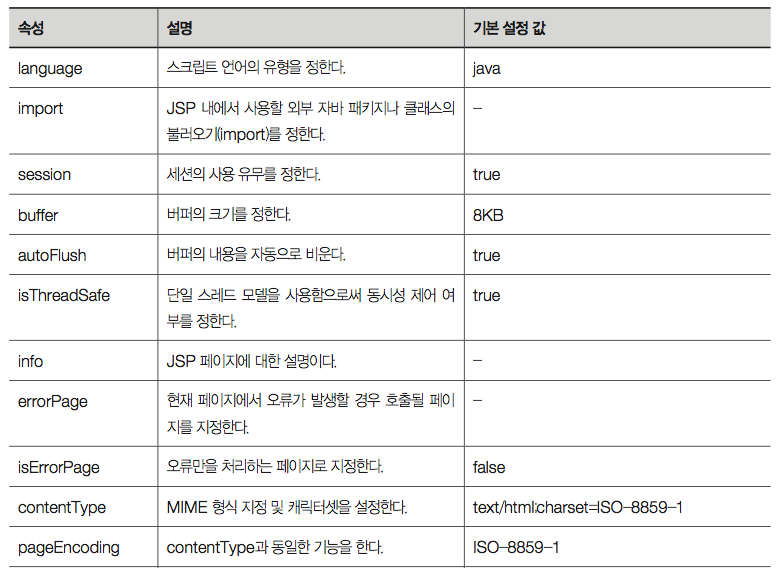
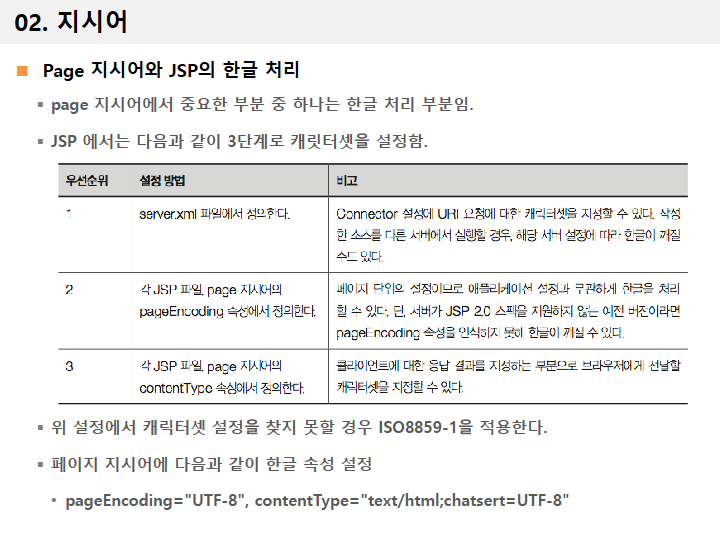
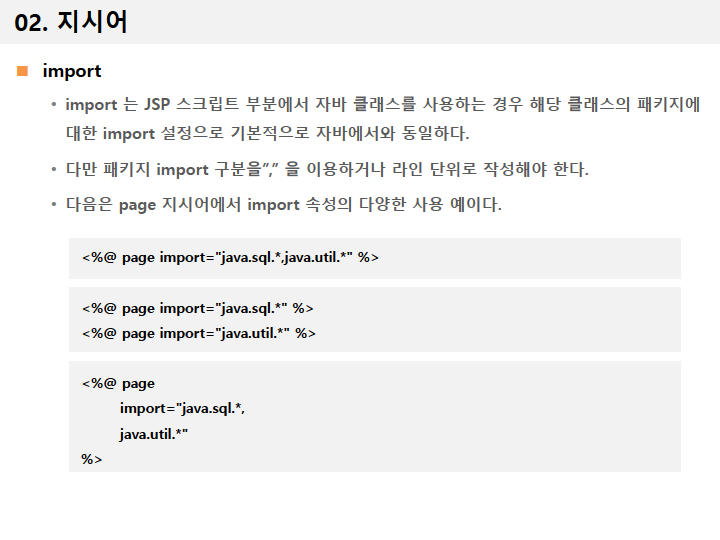
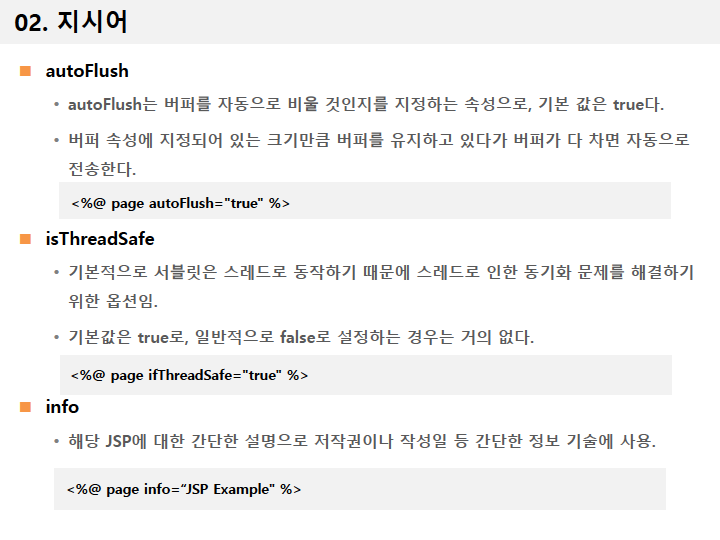
지시어
기본적인 page 지시어는 자동 생성됨.

예제
<%@ page language="java" contentType="text/html; charset=UTF-8"
   pageEncoding="UTF-8"%>
<!DOCTYPE html>
<html>
<head>
<meta charset="UTF-8">
<title>Frame Include</title>
<style>

div.header {
   text-align: center;
}

div.nav {
   text-align: center;
}

div.news, div.shopping {
   width: 45%;
}

div.news {
   float: left;
}

div.shopping {
   float: right;
}

div.footer {
   clear: both;
   text-align: center;
}
</style>
</head>
<body>

   <div class="header">
      <h1>include 지시어 : Header</h1>
      <hr>
   </div>

   <div class="nav">[게임] [쇼핑] [뉴스]</div>

   <div class="contents">
      <div class="news">
         <h3>[최신 뉴스]</h3>
         <hr>
         코로나 바이러스 발생 현황
      </div>

      <div class="shopping">
         <h3>[쇼핑정보] 인기상품</h3>
         <hr>
         좋은 스마트폰
      </div>
   </div>

   <div class="footer">copyright 2020@</div>

</body>
</html>
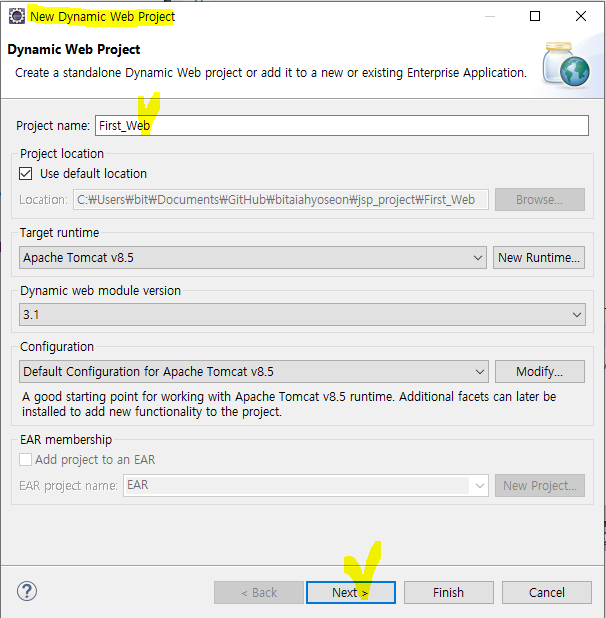
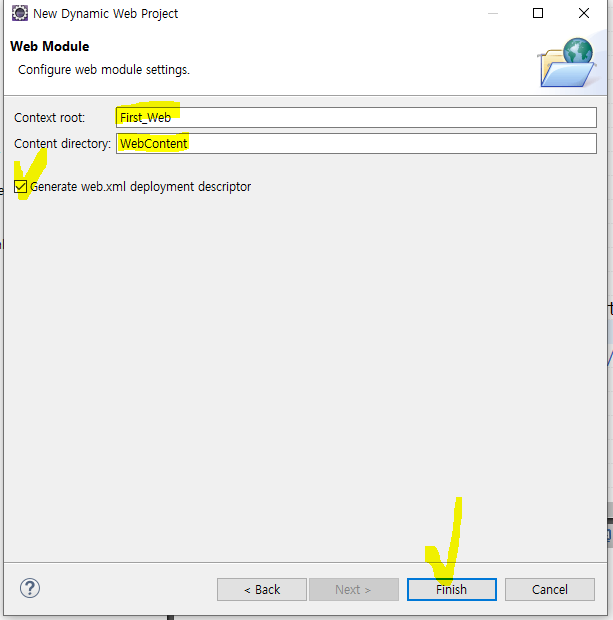
지시어를 사용해 위와 같은 페이지 만들기
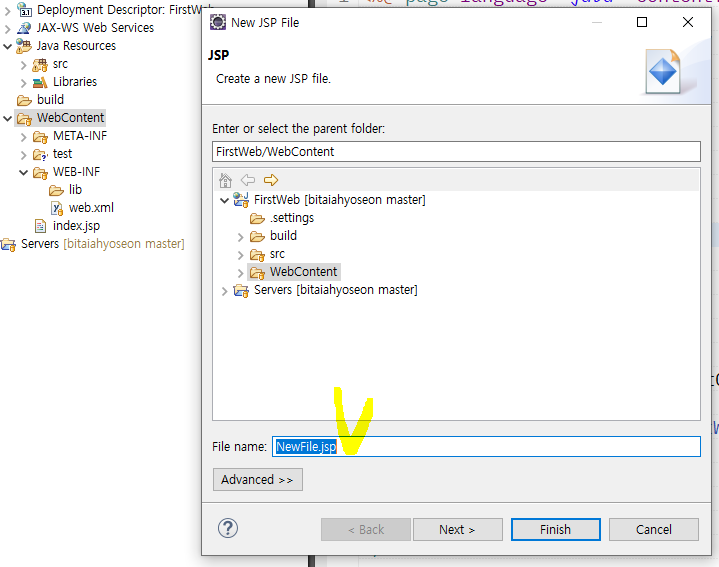
index.jsp
<%@ page language="java" contentType="text/html; charset=UTF-8"
	pageEncoding="UTF-8"%>
<!DOCTYPE html>
<html>
<head>
<meta charset="UTF-8">
<title>Frame Include</title>
<style>
div.header {
	text-align: center;
}

div.nav {
	text-align: center;
}

div.news, div.shopping {
	width: 45%;
}

div.news {
	float: left;
}

div.shopping {
	float: right;
}

div.footer {
	clear: both;
	text-align: center;
}
</style>

</head>
<body>

	<%@ include file="header.jsp"%>
	<%@ include file="nav.jsp"%>

	<div class="contents">
		<%@ include file="news.jsp"%>
		<%@ include file="shopping.jsp"%>

	</div>


  <%@ include file="footer.jsp" %>

</body>
</html>
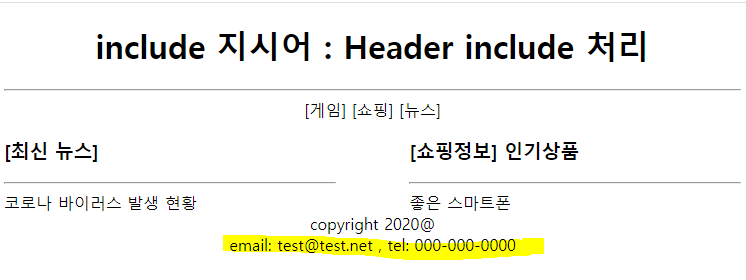
header.jsp / footer.jsp / nav.jsp / new.jsp / shopping.jsp 각각생성
//header.jsp

<%@ page language="java" contentType="text/html; charset=UTF-8"
    pageEncoding="UTF-8"%>
   <div class="header">
      <h1>include 지시어 : Header include 처리</h1>
      <hr>
   </div>


 //footer.jsp

   <%@ page language="java" contentType="text/html; charset=UTF-8"
    pageEncoding="UTF-8"%>
<div class="footer">copyright 2020@</div>


//nav.jsp

<%@ page language="java" contentType="text/html; charset=UTF-8"
    pageEncoding="UTF-8"%>
<div class="nav">[게임] [쇼핑] [뉴스]</div>


//news.jsp

<%@ page language="java" contentType="text/html; charset=UTF-8"
    pageEncoding="UTF-8"%>
      <div class="news">
         <h3>[최신 뉴스]</h3>
         <hr>
         코로나 바이러스 발생 현황
      </div>


// shopping.jsp

<%@ page language="java" contentType="text/html; charset=UTF-8"
    pageEncoding="UTF-8"%>
      <div class="shopping">
         <h3>[쇼핑정보] 인기상품</h3>
         <hr>
         좋은 스마트폰
      </div>
액션
인클루드 / include 액션 / param
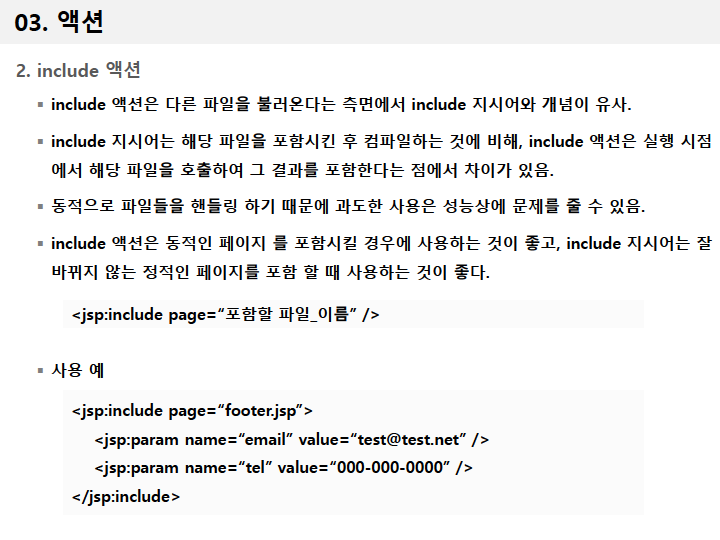
예제1)
위의 index.jsp에 footer 부분을 수정
<%@ page language="java" contentType="text/html; charset=UTF-8"
	pageEncoding="UTF-8"%>
<!DOCTYPE html>
<html>
<head>
<meta charset="UTF-8">
<title>Frame Include</title>
<style>
div.header {
	text-align: center;
}

div.nav {
	text-align: center;
}

div.news, div.shopping {
	width: 45%;
}

div.news {
	float: left;
}

div.shopping {
	float: right;
}

div.footer {
	clear: both;
	text-align: center;
}
</style>

</head>
<body>

	<%@ include file="header.jsp"%>
	<%@ include file="nav.jsp"%>

	<div class="contents">
		<%@ include file="news.jsp"%>
		<%@ include file="shopping.jsp"%>

	</div>

	<jsp:include page="footer.jsp">
		<jsp:param name="email" value="test@test.net" />
		<jsp:param name="tel" value="000-000-0000" />
	</jsp:include>


</body>
</html>
footer.jsp 부분도 수정
<%@ page language="java" contentType="text/html; charset=UTF-8"
    pageEncoding="UTF-8"%>
<div class="footer">copyright 2020@</div>
<div class="footer">email: <%= request.getParameter("email") %> ,
tel: <%= request.getParameter("tel") %></div>
실행 결과
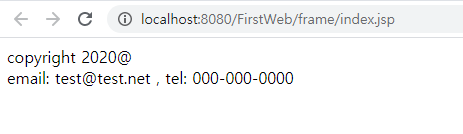
포워드 forward 액션
예제2)
index.html에 forward page를 사용하면
<%@ page language="java" contentType="text/html; charset=UTF-8"
	pageEncoding="UTF-8"%>
<!DOCTYPE html>
<html>
<head>
<meta charset="UTF-8">
<title>Frame Include</title>
<style>
div.header {
	text-align: center;
}

div.nav {
	text-align: center;
}

div.news, div.shopping {
	width: 45%;
}

div.news {
	float: left;
}

div.shopping {
	float: right;
}

div.footer {
	clear: both;
	text-align: center;
}
</style>

</head>
<body>

	<%@ include file="header.jsp"%>
	<%@ include file="nav.jsp"%>

	<div class="contents">
		<%@ include file="news.jsp"%>
		<%@ include file="shopping.jsp"%>

	</div>

	<jsp:forward page="footer.jsp">
		<jsp:param name="email" value="test@test.net" />
		<jsp:param name="tel" value="000-000-0000" />
	</jsp:forward>


</body>
</html>
footer 페이지만 보여지게 된다.
'JAVA > Jsp&Servlet' 카테고리의 다른 글
| [JSP] 쿠키 (0) | 2020.12.17 |
|---|---|
| [JSP] 에러 (0) | 2020.12.17 |
| [JSP] beans 빈즈 (0) | 2020.12.17 |
| [JSP] 내장객체와 속성관리 / 생명주기 (0) | 2020.12.16 |
| [JSP] 기본 객체와 영역 / 내장객체 / request / response / .. etc (0) | 2020.12.15 |
| [JSP] JSP / 서블릿 작성 (0) | 2020.12.14 |
| [JSP] apache tomcat 톰캣 환경설정 (0) | 2020.12.14 |