archive.apache.org/dist/commons/fileupload/binaries/
Index of /dist/commons/fileupload/binaries
archive.apache.org
commons.apache.org/proper/commons-io/download_io.cgi
Commons IO – Download Apache Commons IO
Download Apache Commons IO Using a Mirror We recommend you use a mirror to download our release builds, but you must verify the integrity of the downloaded files using signatures downloaded from our main distribution directories. Recent releases (48 hours)
commons.apache.org


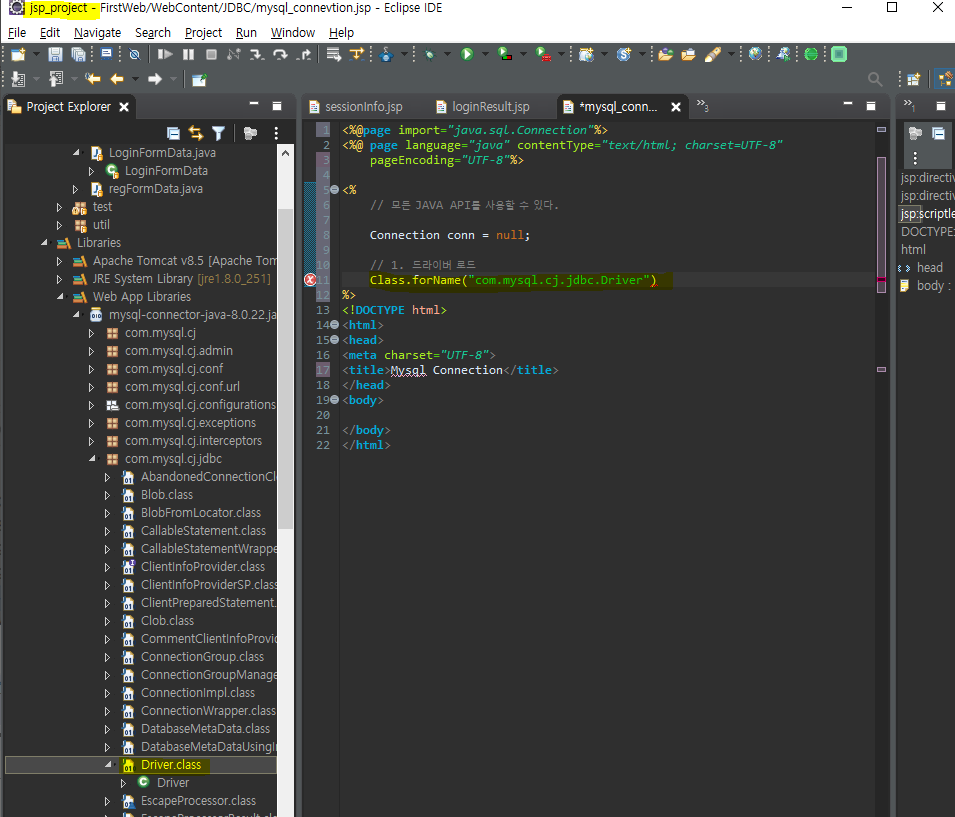
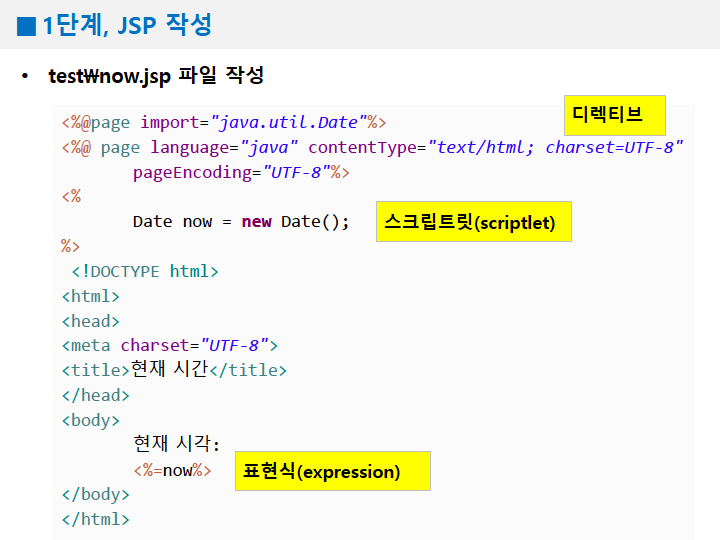
<%@ page language="java" contentType="text/html; charset=UTF-8"
    pageEncoding="UTF-8"%>
<!DOCTYPE html>
<html>
<head>
<meta charset="UTF-8">
<title>파일 업로드</title>
</head>
<body>

	<h1>파일 업로드</h1>

	<!--
				필수 1 : form tag 안의 속성 method="post"
				필수 2 : form tag 안의 속성 enctype="multipart/form-data"
	 -->

	<form action="upload.jsp"  method="post" enctype="multipart/form-data" >

		<input type="text" name="title"><br>

		<!-- 필수3 :  업로드 할 파일을 선택할 수 있는 input -->
		<input type="file" name="file"><br>

		<input type="submit">
	</form>


</body>
</html>
upload.jsp
<%@page import="java.io.File"%>
<%@page import="java.util.Iterator"%>
<%@page import="org.apache.commons.fileupload.FileItem"%>
<%@page import="java.util.List"%>
<%@page import="org.apache.commons.fileupload.disk.DiskFileItemFactory"%>
<%@page import="org.apache.commons.fileupload.servlet.ServletFileUpload"%>
<%@ page language="java" contentType="text/html; charset=UTF-8"
pageEncoding="UTF-8"%>
<%
boolean result = false;
// 파라미터 이름이 title인 데이터를 저장할 변수
String title = null;
// 1. multipart/form-data 여부 확인
boolean isMultipart = ServletFileUpload.isMultipartContent(request);
if(isMultipart){
// 2. 업로드 할 파일을 보관 FileIte의 Factory 설정
DiskFileItemFactory factory = new DiskFileItemFactory();
// 3. 요청을 처리(form 안의 input 들을 분리 )할 ServletFileUpload 생성
ServletFileUpload upload = new ServletFileUpload(factory);
// 4. 사용자의 요청을 파싱(데이터를 추출해서 원하는 형식으로 만드는것)
// FileItem -> 사용자의 요청 파라미터인 input의 객체
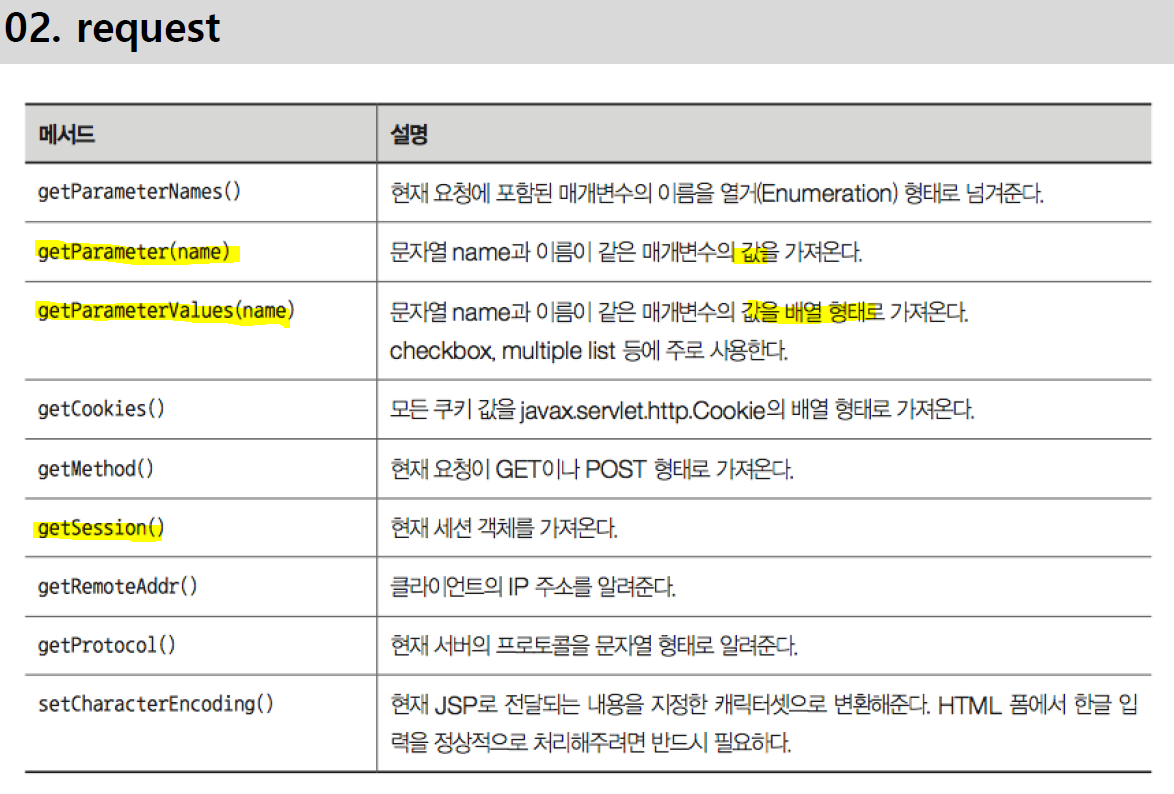
List<FileItem> items = upload.parseRequest(request);
Iterator<FileItem> itr = items.iterator();
while(itr.hasNext()){
FileItem item = itr.next();
// 폼 필드와 파일 을 구분해서 처리
if(item.isFormField()){
// true -> type=file 인 것을 제외한 나머지 필드
// 필드 이름, 파라미터 이름
String fName = item.getFieldName();
if(fName.equals("title")){
title = item.getString("utf-8");
}
request.setAttribute("title", title);
} else {
// false -> type=file 인 필드
String fName = item.getFieldName(); // 필드의 이름
String userFileName = item.getName(); // 파일의 이름
String contentType = item.getContentType(); // 컨텐트 타입
long fileSize = item.getSize(); // 파일의 바이트 사이즈
System.out.println("필드 이름 : "+fName);
System.out.println("파일 이름 : "+userFileName);
System.out.println("컨텐츠 타입 : "+contentType);
System.out.println("File size : "+fileSize);
// 파이을 서버의 특정 폴더에 저장(쓰기)
if(!userFileName.isEmpty() && fileSize>0){
// 파일을 실제 저장할 폴더의 시스템 경로
String dir = request.getSession().getServletContext().getRealPath("/upload");
System.out.println(dir);
// 저장할 경로를 File 객체로 생성
File saveFilePath = new File(dir);
// 폴더가 존재하지 않으면 폴더를 생성
if(!saveFilePath.exists()){
saveFilePath.mkdir();
}
// 파일 쓰기(저장)
item.write(new File(saveFilePath, userFileName));
System.out.println("파일 저장 완료!");
// 완료시에 전달할 데이터
request.setAttribute("saveFileName", userFileName);
}
}
}
// 정상 처리
result = true;
request.setAttribute("result", result);
}
%>
<jsp:forward page="upload_view.jsp"/>upload_view.jsp
<%@ page language="java" contentType="text/html; charset=UTF-8"
pageEncoding="UTF-8"%>
<%@ taglib prefix="c" uri="http://java.sun.com/jsp/jstl/core"%>
<!DOCTYPE html>
<html>
<head>
<meta charset="UTF-8">
<title>Insert title here</title>
</head>
<body>
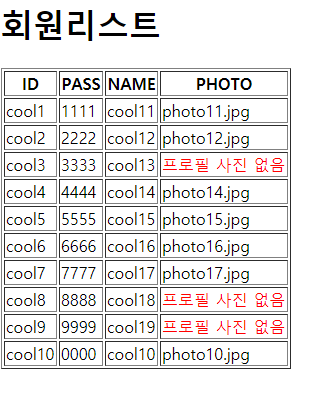
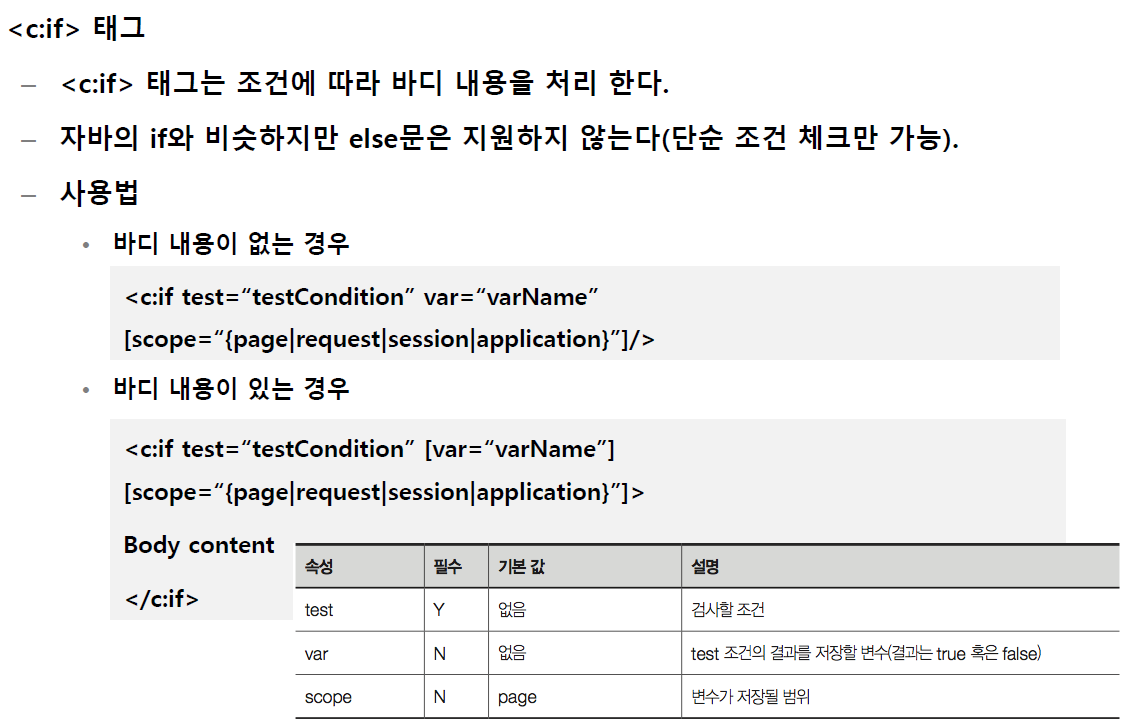
<c:if test="${result}">
<h1>파일 업로드가 되었습니다.</h1>
<h3>
TITLE : ${title}<br> 파일 이름 : ${saveFileName}
</h3>
<img alt="프로필 사진" src="<c:url value="/upload/${saveFileName}"/>">
</c:if>
<c:if test="${!result}">
<h1>파일 업로에 문제가 발생했습니다. 다시 시도해주세요.</h1>
</c:if>
</body>
</html>'JAVA > Jsp&Servlet' 카테고리의 다른 글
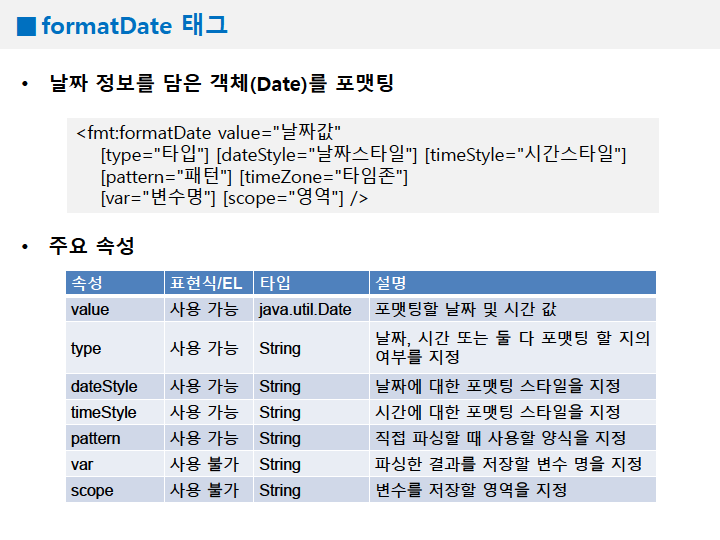
| [JSP] JSTL - fmt (0) | 2020.12.23 |
|---|---|
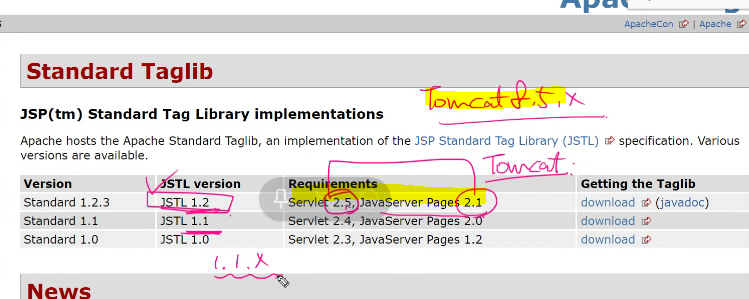
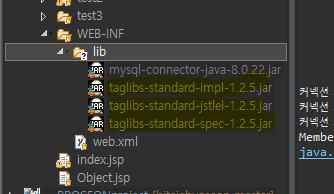
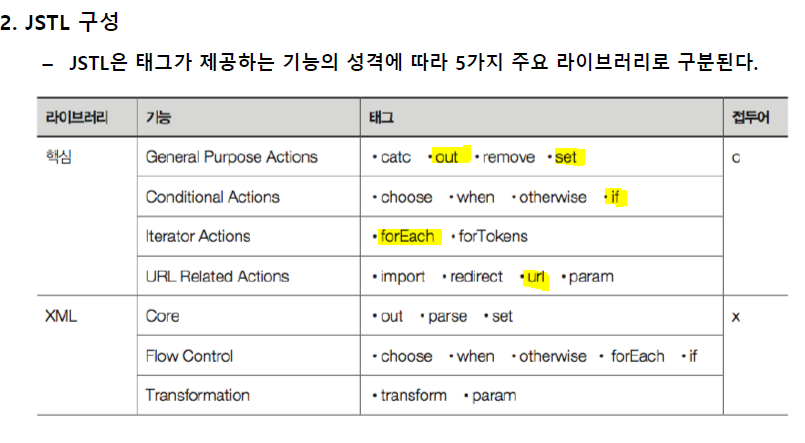
| [JSP] JSTL 설치 및 사용 / core <c:~> (0) | 2020.12.23 |
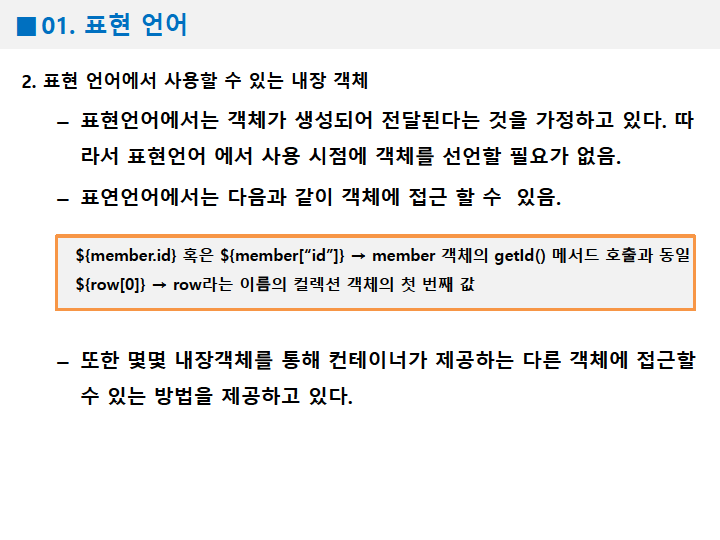
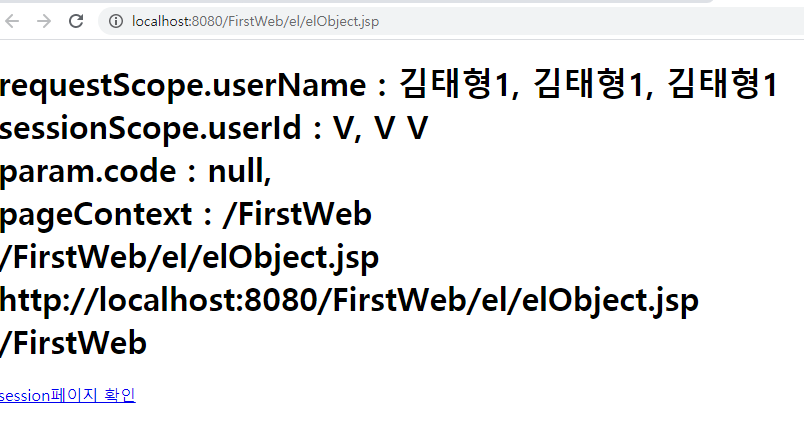
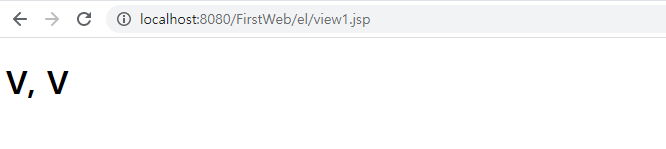
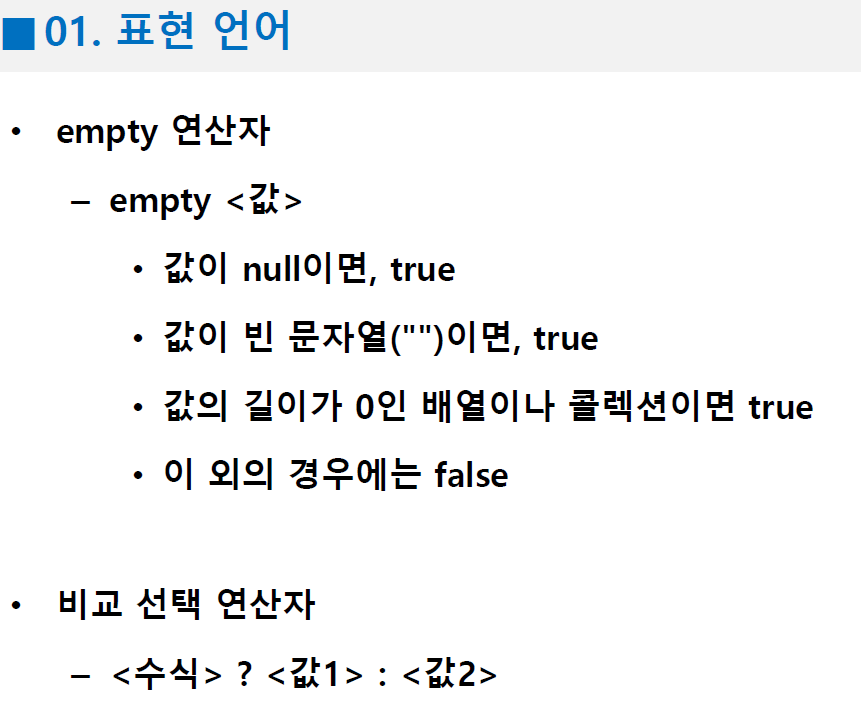
| [JSP] 표현언어 EL / Expression Language (0) | 2020.12.23 |
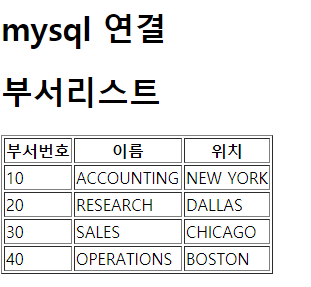
| [JSP] mysql JDBC (0) | 2020.12.18 |
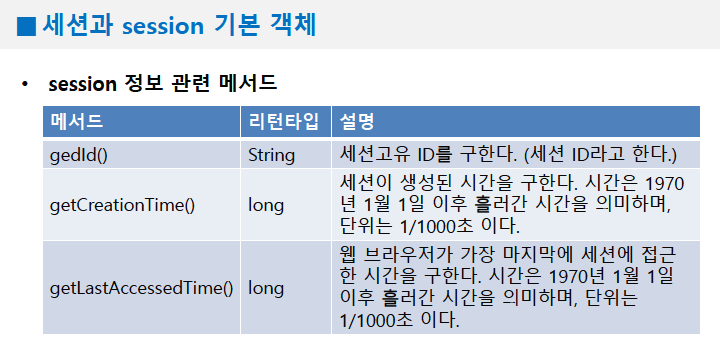
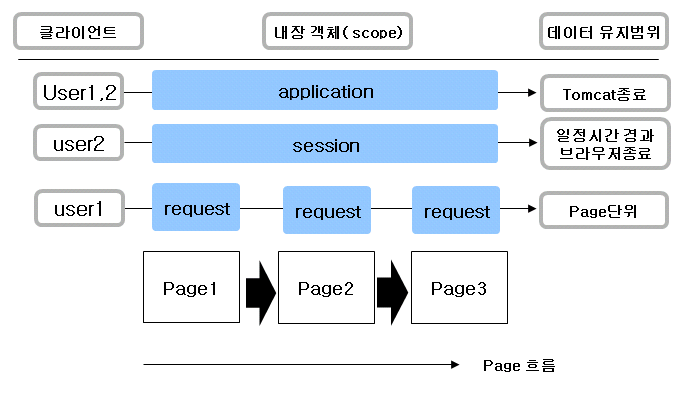
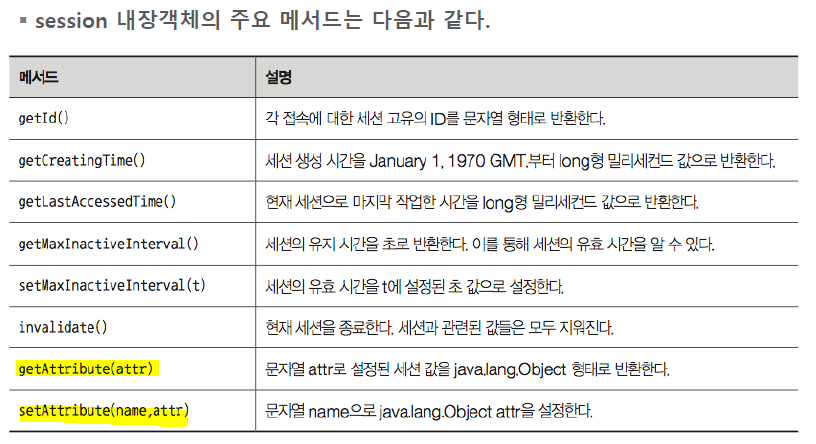
| [JSP] session 기본 객체 (0) | 2020.12.18 |
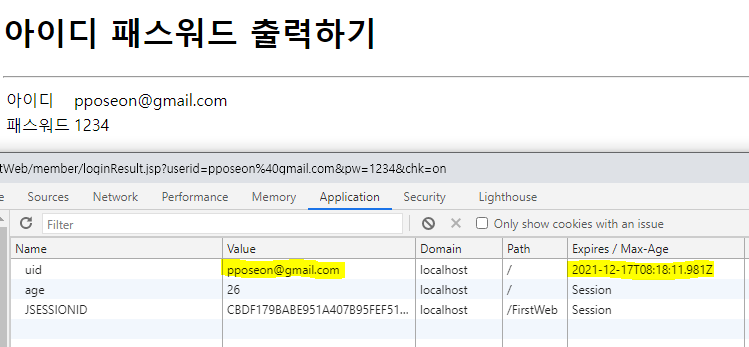
| [JSP] 쿠키처리를 위한 유틸리티 클래스 만들기 (0) | 2020.12.17 |
| [JSP] 쿠키 (0) | 2020.12.17 |